Previously: Fabric requirement and cutting
Time to start assembling the main outer bag!
Oh, I should mention right off... all seam allowances are 3/8" unless specifically stated otherwise.
First, make the strap piece from the 3"x12" rectangle that you trimmed after cutting the side bag pieces. This will be cut into bits later on, to hold the rectangle rings in place. Fold and press the edges of the strip toward the middle (wrong sides together), and stitch two rows of top-stitching down each side. Yes, this leaves the raw edges exposed, but it will not be a problem, as you will see later on. Set this piece aside.
Next, make the pockets.
For the front pocket, stitch together one outer fabric and one lining fabric 6"x12" rectangle, right sides together. Press the seam open, and then turn the pieces wrong sides together and stitch two rows of top-stitching along the seam.
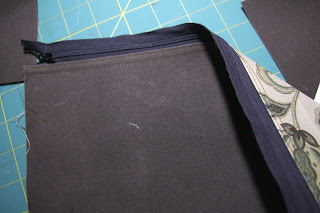
The back pocket is made in a similar fashion, but it has a zipper inserted into the seam. Make sure that you have the right side of the zipper facing the outer fabric when you pin it in place.
Stitch the 1"x12" fabric to the other side of the zipper, making sure to line up the fabric with the zipper closed, so that the pieces are not off-set. Press the fabric up away from the zipper, and then turn down the raw edge to meet the seam underneath the zipper and press down. Set aside til later. (Do not topstitch this piece yet.)

Now assemble the pocket unit.
With right sides together, place the 5"x12" rectangle on the bottom (non-zipper) edge of the back pocket. Stitch the seam, and press the raw edges away from the pocket.
Stitch the other side of the base piece to the front pocket, leaving a 2" gap in the center of the seam, and again pressing the seam allowances away from the pocket.


Now it's time to attach the pocket unit to the main (22"x17") bag body piece. Fold this piece along the 22" sides to find the center, and mark it on both edges.
Also, find and mark the center points on the edges of the bag base piece, by folding it so that the two seams match up. Make sure that you do not just fold the entire pocket unit in half, as the two pockets are not the same depth, and this would make your bag lop-sided.
Place the pocket unit on top of the body piece, pocket wrong side to bag front side (so that both fronts are facing up), matching the marked center points. Pin in place along both edges.
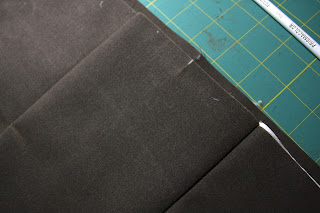
Topstitch (two rows, again) along the edge seam of the base piece on the back pocket side. Then, making sure that the pocket is flat, topstitch along both sides of the fabric strip above the zipper.

Again, making sure that the pocket unit is flat and even, make a line in the center of the front pocket, and make a double row of stitching to divide the pocket into two sections. Make sure not to stitch into the base fabric where the gap was left earlier.
Now cut a 2.5" piece of the strap that you created earlier, and feed it through one of the rectangle rings, with the raw edges to the inside.
Place this piece into the gap between the base and the front pocket, and then stitch the two rows of top-stitching along the front edge of the base.
There! Now you've stitched down the whole pocket assembly to the main bag section.
Now take your two 3.5"x22" strips, and sew them on; one on each side. Trim off any extra zipper after the side piece is sewn on; press (with both seam allowances toward the side pieces), and topstitch.
And there you have it - the main outer body all finished... two front pockets, a ring for the fastener strap, and a big zipper pocket on the back.
Next installment: creating the lining and sewing the side seams.


No comments:
Post a Comment
Note: Only a member of this blog may post a comment.